News
Homebrewing with Extract January 30 2023, 0 Comments
Have you ever had a homebrew that was made with malt extract that just seemed too dark for the style, had an unanticipated caramel flavor, or just had that "extract tang"? While these things don't have to ruin a beer or your enjoyment of it, it would be nice to avoid these issues. Today we're going to talk about a couple ways you can improve your homebrews made with malt extract.
Shorten the Boil
Since a typical extract boil has a much higher gravity, thus concentration of sugar, than a typical all-grain boil, the wort will darken with an extended boil. So if you shorten the boil to 30 minutes, you can keep the color lighter and reduce the caramelly "extract tang" that can sometimes be found in homebrew.
A 30 minute boil should still be long enough to sanitize the wort, boil out proteins from the wort, and boil off the pre-cursors to DMS. To compensate for the shortened boil time, we recommend adjusting your bittering hop addition upward a little bit. We have transitioned all of the extract kits we sell to 30 minute boils.
Add Some Extract Later in the Boil
If you do want to do a full 60 minute boil, we recommend adding adding about a third of the extract at the beginning of the boil, boil for 50 minutes, turn off the heat, stir in the rest of the extract, bring the wort back to a boil, and finish the 60 minute boil.
Because you are boiling a more dilute wort, you will avoid excessive caramelization (keeping the color lighter and reducing the caramel flavor) and get better utilization from your hops.
Full Boil
Doing a full boil, where you start (for 5 gallon batches) with more like 6.5 or 7 gallons and boil it down to 5.25ish gallons of wort at the end. This mimics what you would be doing in an all-grain batch. Because it is a more diluted wort, it helps avoid caramelization and increases your hop utilization. The downside is that you will need a powerful burner and a wort chiller (since you will not be topping up with cold water).
Heavy Duty Kettle
A tri-clad, stainless steel kettle will disperse heat much more evenly than a thin, more economy-style kettle, which will lead to less scorching and caramelization.
Avoid Excessively Vigorous Boil
You just need a nice easy, rolling boil. It does not have to be a violent, turbulent boil. Keeping your boil in check will not only help avoid caramelization, but will also avoid boiling off some of the aromatics of the malt and hops that you want in your beer.
For more tips and tricks, check out our Knowledge Base
Carbonating Homebrew January 04 2023, 0 Comments
It's the start of a new year, so let's learn something about the beermaking process. Today let's talk about how to carbonate beer! You can get carbonation into your beer a few different ways. We'll split them up into bottling and kegging.
Bottling
- Bottle Priming - If you are bottling directly from your fermenter, siphon your beer into your bottles and then add a small amount of corn sugar to each bottle, we recommend just under 1 teaspoon per 12oz bottle for "standard" carbonation levels. Cap, gently swirl the bottle to help the sugar dissolve, and let sit at room temperature for 10-14 days.
- Batch Priming - Siphon the beer into a sanitized container. Add 1 cup of corn sugar to a boiled cup of water, gently stir this solution into the beer, siphon the beer into the bottles. Cap and let sit at room temperature for 10-14 days.
- Natural Carbonation - Sanitize your keg and siphon your beer into it. Add 1/2 cup of corn sugar to a boiled 1/2 cup of water, gently stir this solution into the beer, purge the air from the keg, seal the keg and hook it up to serving pressure, and let sit at room temperature for 10-14 days.
-
Forced Carbonation - Sanitize and fill your keg with beer. Purge the air from it, seal it and do one of the following:
- Hook it up to serving pressure and store it at refrigeration temps for 2-3 weeks. Drink when ready!
- Hook it up to 35ish psi and store it at refrigeration temperatures for 24-48 hours. Purge pressure and hook up to serving pressure. Test the carbonation level. If too low, hook back up to CO2 and leave for 8 hours. If too high, disconnect CO2 and release the pressure every 30 minutes for a couple of hours until carbonation levels are ok.
- Cool the beer to refrigeration temperatures. Crank the pressure up to 45-50 psi. Dose the keg with pressure. Unhook the CO2 and shake the keg vigorously. Repeat the previous 2 sentences 4-5 times. Purge pressure and hook up to serving pressure. Test the carbonation level. If too low, hook back up to CO2 and repeat the shaking process once or twice. If too high, disconnect CO2 and release the pressure every 30 minutes for a couple of hours until carbonation levels are ok.
For more tips and tricks, check out our Knowledge Base!
Dip hopping May 27 2021, 0 Comments
With each passing day, it seems that there is another new type of hop to experiment with. And it also seems with each passing day, there's a new way to utilize these hops!
You've probably heard of mash hopping, first wort hopping, adding hops in the boil, dry hopping, double dry hopping, adding hops during active fermentation, whirlpool hopping, etc. But have you heard of "dip hopping?" This is a new one for me.
Dip hopping is a method that helps accentuate pleasant hop aromas while suppressing hop off-flavors. First experimented with by brewers at the Kirin brewery in Japan, dip hopping follows these general steps:
- Running at least a portion of the wort from the kettle into the fermenter
- Partially or completely cooling it
- Adding hops prior to fermentation (but leaving the hops in)
There are may different ways you can experiment with dip hopping, including:
- Running more or less of the wort into the fermenter
- Cooling the wort down to different temperatures to attempt to bring out different characteristics
- Letting the hop tea created by the dip hopping sit for longer or shorter times before adding the rest of the wort
- Use different hops and hop amounts in the dip hopping stage
Brewers who have experimented with dip hopping have reported beers that are super aromatic, like a west-coast IPA, but without the onion and garlic aromas.
A good place to start perhaps would be to pull about 3/4 of a gallon of wort from your kettle into the fermenter about half way through your boil, cool it down to 170F, and add your dip hops (maybe 30% of the hop bill?). Finish the rest of your boil, add the rest of the wort to the fermenter, and away you go.
Happy hopping!
IPAs not just about hops November 09 2017, 0 Comments
Gearing up to make the next great IPA or Imperial IPA? Trying to figure out which hop characteristics you want? While that's uber important in an IPA (duh!), don't forget about the rest of the ingredients!
Hops
Do you want a harsh, bracing bitterness? Soft and in the background? Lots of flavor, mostly aroma, straight bitterness, a good mix of all of them? And for the flavor/aroma, are you looking for lemony, floral, dank, citrus, pineapple, spicy, minty? A mix of characteristics, or one unified flavor?
Malt
If you use a base malt that is too light or neutral, your IPA can lack body and backbone, so it sometimes can end up tasting like hoppy fizzy water. If use Munich-style malts or Caramel malts too heavily, your Imperial IPA starts to enter the barley wine zone.
We recommend using a base malt that has a fairly low protein content. More and more brewers seem to be having great success with hoppy beers using Golden Promise as a base. Try to limit your specialty malt use to a minimum to draw out very specific characteristics.
Yeast
Do you want fruity, spicy, or maybe neutral characteristics? Lots of sweetness left behind, or do you want a very dry beer? More or less mouth-feel and body? Clear or hazy?
There are many factors to consider when selecting your yeast!
Water
Do you have hard water or soft water? This can make a big difference when brewing a hoppy beer. If you have too much hardness, the bitterness can come out harsh and overwhelming on the palate. If your water is too soft, the hops just won't shine like you want them to.
If you do have hard water, you can dilute your tap water using Reverse Osmosis or distilled water, in effect softening your water. If you need to add hardness, gypsum is always a good candidate.
Conclusion
It can a little overwhelming when considering all of the different variables that can go into preparing for brew day. That's where we come in! You are always more than welcome to stop in the Shop, give us a call (608-257-0099), or e-mail us if you have questions or want advice or a second opinion. Sometimes it takes a village to make great beer!
Look at those yeast fly!!! September 06 2017, 0 Comments
Very often people don't consider the effect that yeast have on their beer, wine, cider, or mead. But there are literally billions of these microscopic organisms at work, converting sugars to alcohol, co2, and flavor compounds. Just look at this video of them feasting on this IPA!
Pros and Cons of Electric Brewing June 27 2017, 0 Comments
Ever think about turning your gas powered home-brewery into an electric one? There are some factors you will want to consider, including:
- Depending on the power in your house, you may have to put in a new circuit or at least some new outlets.
- You will DEFINITELY want a GFCI outlet for safety purposes.
- Electrical systems are harder to take on the road to brew at a buddy's house
- You will need a way to deal with all of the moisture created during the brewing process. Setting your mash tun and boil kettle beneath a window into which you can install a fan is an easy way to do this.
There are many positives to brewing electrically, including:
- You can brew inside, which often decreases setup and cleanup time.
- You can brew year-round (more beer!).
- Electric heating elements are much quieter than either natural gas or propane burners.
- No propane, so especially if you brew in a garage or in a basement, you eliminate the threat of carbon monoxide poisoning.
If you have any questions about turning your gas brewhouse into an electric brewhouse, always feel free to ask us questions!
Washing your yeast June 09 2016, 0 Comments
The next time you re-pitch yeast into a new batch, consider doing a quick Yeast Wash / Rinse first. This will help separate and capture all the viable, healthy yeast from the trub and old beer.
Here's a quick how-to:
1) Prior to re-pitching, boil 1 gallon of water for 10-15 minutes, then chill that water.
2) Decant off any beer/liquid from the yeast you plan to re-pitch from the container the yeast has been stored in.
3) Pour your boiled and chilled water into that storage container.
4) Swirl and re-suspend all the solids in that container.
5) Clean and sanitize another container (like a flask in the picture).
6) Pour the contents of the container into the freshly sanitized container. Top up with remaining boiled and chilled water and cover with sanitized stopper and airlock or aluminum foil.
7) Let settle for a couple of hours. You'll notice any remaining beer float to the top and hop particles, dead yeast sells, and other solids float to the bottom. You want to keep everything else.
8) Decant off the beer.
9) very gently swirl the container, not to aggressively to disrupt the darker solids on the bottom.
10) Pour into fermentor, leaving behind the darker solids.
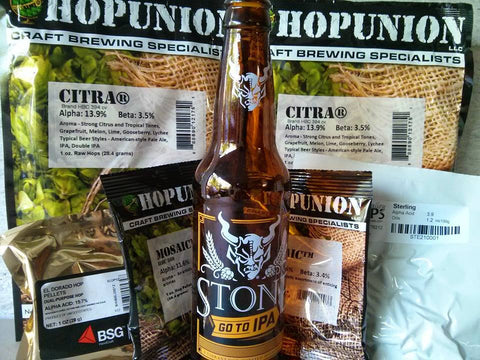
Dry-Hopping January 27 2016, 0 Comments
For that next beer with a big wallop of hops in the aroma, try dry hopping for only 24-36 hours at room temperature. Ryan at the Shop has had great luck with this method recently, especially when attempting to brew over-the-top hopped stuff, like Stone's Go-To IPA.
HopShot Extract August 13 2015, 0 Comments
Try HopShot in your next hop-forward beer. Super easy to use and no hop trub! Try letting the HopShot soak in hot (but not boiling water) before injecting your wort so that it flows nicely out of the syringe. And mind the (SUPER) sticky ring on the kettle when cleaning afterwards. Try rubbing alcohol to remove the sticky film...
Calculate a 5mL Hopshot to contribute 50 IBU in a 1.050 wort.
For Beersmith users, I found that setting the AA% to 75 contributed 50 IBU in a 5 gallon 1.050 wort. The bitterness contribution will change depending on wort density, as with any hop addition, so heads up on that, too!
Blow-Off Tube May 12 2015, 0 Comments
Putting 5.5 gallons in a six gallon carboy? Planning to use a vigorous top-fermenting wheat yeast for your summer Hefeweizen? Adding blood oranges to your next batch of IPA? Then consider using a blow-off tube -- better that then coming home to a popped stopper or krausen gushing from your airlock.
Here's a few option for your blow-off setup, ***all of which have you placing ~1" of the tip of the tube into a bucket/pitcher of water or sanitizer:
- Use Blow-off tubing, a 1" ID tube that fits neatly in the neck of a glass carboy.
- Squeeze 1/2" ID over the middle part of a 3-piece airlock (see carboy on right in pic).
- Jam 3/8" ID (or 5/16 ID) standard siphon tubing into a #6, 6.5, or 7 drilled rubber stopper (see carboy on left in pic).
- Fit 3/8" or 1/2" ID siphon tubing over one of the tips of a carboy cap.

Using Fruit in Brewing April 29 2015, 0 Comments
Planning to use fruit in your next brew? A pineapple wheat for lounging on the deck or a cherry smoked imperial stout for winter, perhaps. Well, here's some things to consider:
- Try freezing the fruit first, then gently smash and add to the secondary fermentor. Freezing bursts the fruit's cell walls, making the sugars more readily accessible to your beer yeasties!
- Add some unfermentable sugar along with the fruit (or prior to bottling). A sugar like lactose or sweeteners like xylitol or nutri-sweet work. Start with just a bit, then add more to taste if needed. This will bring back some of the sweetness we expect from fruit, sweetness that's no longer present in the finished beer since all that sweet fructose will be eaten up by your beer yeasties!
- You could also use a fruit flavor extract to supplement the actual fruit. A little goes a long way.
- Expect any addition of fruit to restart fermentation, so have your blow-off tube or extra head space in the fermentor ready!

Yeast Pitching Rate March 17 2015, 0 Comments
Hey Home-Brewers! Have you ever thought about your yeast pitching rate? If not, now is a great time to start! Basically, pitching rate is the number of yeast cells in billions that you add to a given volume of wort (usually in gallons). Pitching rate is extremely important for yeast health to help provide an active, healthy, complete fermentation. In general, the higher gravity your beer, the higher pitching rate you will need. Additionally, lagers need an even higher pitching rate than ales. To calculate your pitching rate, try a free online calculator tool like the Mr. Malty yeast calculator.
In cases where you need a higher pitching rate, you can either buy multiple packages of yeast or you can make a starter. Check out how to make a yeast starter on our website under our knowledge base.
If you're interested in learning more about yeast pitching rates, sign up for one of our intermediate or all-grain beer classes!

Ferment Fast with S-04 January 14 2015, 0 Comments
Need to get a beer ready in time for the Packer's final game of the season (aka the Super Bowl)? Consider making an ale using Safale S-04 from Fermentis. This British ESB yeast is a fast and vigorous fermenter that drops out quickly and leaves a very clear beer in as little as a week. This dry yeast also leaves a malty sweetness that is great in everything from pale ales to stouts. Several of our kits use S-04 yeast including our Zombie Sue Pale Ale, Badger Dark Ale, and the super quick Boogiepop Session Ale, which is great for all-day-game-day enjoyment. Check out this great yeast today and GO PACK!
Brew Fast, Ferment Fast December 20 2014, 0 Comments
We recently added a new kit to our lineup: What the Fuggle Session Scotch Ale. This malt-forward beer exclusively features the Fuggle hop and only requires a 30 minute boil. It's definitively delicious. We recently whipped up a batch for the shop, and from brew day to packaging, it only took 7 days! It will be on tap at the Shop soon...
Bonus Tip/Trick: We also pitched the Clarity Ferm additive with the yeast. Clarity Ferm acts as a fining/clarifying agent as well as reduces the gluten levels in the finished product, a bonus for those of you trying to avoid gluten but still craving beer!

Cooling Your Wort December 17 2014, 0 Comments
When brewing in the winter, you might be tempted to cool your boiling wort in a bank of snow (a la Jack in The Shining). But beware! Yes, that snow will chill the kettle for a short time, but quickly it will start to act as an insulator and have the opposite effect you intended.
A more productive way to use snow would be in your ice bath as you chill. You can also add a copper wort chiller to the equation for optimal cooling.

Utilize the Cold, Make a Lager December 16 2014, 0 Comments
Get winter to work for you in your brewing: make a lager! If you have a space in your house that is a constant 45 - 58F, then you're all set to ferment at the cool temps lager yeasts requires. We have a great selection of lager kits and yeasts, so give one a try. We promise you that they're worth the cold and the time.
Maybe even try our newest lager kit: Helles Hath No Fury Munich Helles! This beer is the malty, crisp, and refreshing lager that you always see poured in 1 liters in biergartens. Channel Bavaria in your own home!

Yeast Lag Time December 15 2014, 0 Comments
Ever notice how your yeast sometimes take a day or two to start fermentation? It can be concerning, for sure, and you might think that you got a bum yeast packet. But what might actually be going on inside your fermentor is the preliminary step of fermentation, a growth phase for the yeast. During this stage, the yeast cells are splitting, increasing vastly in number, getting ready to eat all those sugars in the wort. Once the yeast has grown up its colony, then begins that active fermentation that creates CO2 (we see in our fermentation lock) and krausen (the foamy head on the fermenting beer), two of the most visible signs of fermentation.
So, next time your beer doesn't kickoff to a vigorous fermentation within a day of pitching your yeast, you may want to wait just a bit longer before pitching more yeast.

Wash and Reuse Yeast November 12 2014, 0 Comments
Do you need to save a couple dollars but NEED to brew? Try washing your yeast! It's a simple way to reuse viable yeast and save money. You'll do this washing immediately after transferring your beer off of the primary yeast cake.- Boil one gallon of water for 15 minutes, while your waiting sanitize one large container (like a 1 gallon jug), a few large mason jars and lids and a funnel. Ideally, you'd boil the jars and lids, too.
- When your timer is up, chill the kettle of water in an ice bath (like you would wort).
- Siphon your beer off the yeast into a secondary fermentor, bottles or a keg. Sanitize and return the airlock to the fermentor.
- After your water has chilled, make sure it is at room temperature and pour it into the primary fermentor (that contains the yeast cake). Shake it up!
- Place carboy on its side and let it settle for 30 minutes. There should be definable layers. The yeast is the milky layer.
- Carefully pour that milky, yeast layer into the sanitized 1 gallon jug , leaving as much of the dead yeast and hop particles behind as possible. Place an airlock on this container, and let settle for another 30 minutes.
- After it has settled, pour into sanitized jars, seal them up and place in refrigerator.
- Use within 3 months or so -- as always with yeast, the fresher, the better!
Backup Yeast October 28 2014, 0 Comments
A simple yet important tip. Whether you are a homebrewer or a winemaker, always keep a backup pack of dry yeast on hand. They keep for a few years, especially if you keep them in the refrigerator. Montrachet yeast is a great all-purpose choice for wine and Safale US-05 works for pretty much any ale. You never know when you'll have to save that precious batch with a backup yeast...
Change One Variable October 22 2014, 0 Comments
A great way to experiment with your homebrew is by splitting a batch into multiple fermenters and changing one variable. For instance, pitch WLP001 California Ale into one fermenter and Wyeast 1450 Denny's Favorite 50 into the other. Or, us e the same yeast but dry-hop with Mosaic in one and Nelson Sauvin in the other. Because everything else is the same, it really allows you to notice and enjoy (or not) the differences between yeasts and hops.
This can be a great way to figure out which yeasts and hops you prefer in different beer styles.
Gluten-Free Brewing August 26 2014, 0 Comments
Got a friend or family member who wants to try your homebrew but is going gluten-free? There's a couple of great ways to make a tasty brew without the gluten. Instead of using malt extract or brewing from malted barley, you can use sorghum extract, Belgian candi sugar, brown sugar, molasses, rice syrup solids, or corn sugar to make up your fermentables. Maltodextrin can be used to add body and mouthfeel to your beer and you can roast your own naturally gluten-free grains like wild rice, millet, quinoa, or gluten-free oats to add flavor and body as well. You can easily make everything from an IPA to a stout with these ingredients.
Above and beyond that, you can make a normal beer recipe into a almost-gluten-free beer by adding Clarity Ferm at the same time as your yeast. This wonderful clarifier will reduce the ppm of gluten below 20, the current international standard for gluten-free.
Using these tips, gluten-free doesn't have to be flavor free!
Softening Hard Water August 15 2014, 0 Comments
Hello fermentation specialists! Here's a tip for the homebrewers out there. Because Madison has very hard water, which can lead to mineral or chalky flavors in finished beer, it's not a bad idea to dilute your brewing water with Reverse Osmosis or distilled water. When I brew malty beers or Pilseners or the like, I use between 50% to 75% RO water. If I'm brewing hoppy beers (which I usually am), I use 25%-50% RO water and add a little gypsum.
Extract brewers can use all RO or distilled water, because the extract has enough of the micro-nutrients that your yeast want. For more information on your tap water, contact your local municipality and ask for a water report for your area. And as always, if you have any questions about water treatment or anything else, stop on in.
Easy Sparging August 11 2014, 0 Comments
Homebrewing Tip About Rinsing Steeping Grains / "Sparging": When you're rinsing your grains (aka "sparging"), it's helpful to use a strainer or colander that can seat inside your kettle and hold the muslin bag and steeping grains, which will allow you to safely pour the hot sparge water over/through the grains and into the boil kettle.
Keep this step in mind when calculating the volume in your boil kettle BEFORE you start your brew. And also note that this sparge step is not an essential one on your brew day, but it helps rinse more of the sugars and "character" from your steeping grains.
Use a Sparging Bag August 09 2014, 0 Comments
Consider a sparging bag for those indoor brews. These bags make steeping or partial-mashing (or even full mashing) a breeze because they're coarse enough to allow water exposure to all the grain, fine enough to prevent any grain from sneaking into the wort, and equipped with a drawstring for easy rinsing/sparging. You can also clip it to your kettle with binder clips and avoid any hassle of it sinking into the wort!

Extract Beers Too Dark? August 01 2014, 0 Comments
Are your extract beers coming out a little darker than you would like? One trick is to add half of the extract before you begin your boil and then add the rest with about ten minutes left in the boil. It's quite easy, with about ten minutes left in the boil, turn off the heat, stir in your extract, bring back to a boil, then finish the boil. This will help lighten the color, reduce caramel flavors, and increase your hop utilization.
Adjusting Brewing Gravities July 31 2014, 0 Comments
Gravity too low on brew day? There's an easy fix: Always keep a bag of Dry Malt Extract (DME) on hand just in case! Here's a handy link from John Palmer's How to Brew that walks you through how to calculate the amount of DME to add: http://www.howtobrew.com/section1/chapter3-4.html.
If your gravity is too high -- just add water.

Adding Fruit to Beer July 25 2014, 0 Comments
Brewing up a fruit beer this summer? It's awesome to use real strawberries or peaches, but you can also supplement those natural fruit flavors with some of our fruit flavors and extracts. Just a little goes a long way in creating that summertime flavor and feeling!
If you are adding actual fruit, our two favorite times to add the fruit are:
- Right when you turn off the heat of your boil and start to cool down the wort. This pasteurizes the fruit so you don't get an infection without cooking off too much of the fruit character.
- In the secondary fermenter. If you do this and you're using fruit you picked or bought, we recommend either pasteurizing, blanching, or using metabisulfites to kill off any bacteria that may be in the fruit. If you use a canned puree or fruit base, you can just add it directly to the secondary, it's already been pasteurized.
If you are adding the fruit flavorings or extracts, you can add them at any point, we recommend doing it right at bottling or kegging, so you can nail the amount perfectly.
A great way to get a fantastic fruit character in your beer, cider, or mead, is to start with actual fruit and then supplement the character with the fruit flavorings at bottling time if necessary.
Cool Your Wort Down Faster July 23 2014, 0 Comments
When it's really hot out, it can be tough to get your wort cooled down quickly, since it's so hot and the ground water is quite warm. Here's a tip or two if you're brave enough to brew on hot days.
If you're an extract brewer, put your top-up water in the fridge a few hours before you brew to cool it down. If you're an all-grain brewer and use an immersion chiller, while chilling, either stir the wort with a spoon or use the chiller to get a whirlpool going. This will cool your wort down more quickly and efficiently.

Fermenting Lagers July 21 2014, 0 Comments
For lager fermentation, try following this fermentation schedule:
- Pitch into cold wort, around 45F.
- Allow the beer to free-rise up to your primary lager fermentation temp, 52-55F, and ferment at that temp for the duration of primary.
- Once primary fermentation is complete, preform a diacetyl rest, which entails raising the temperature to around 68F and holding it at that temp for 2-3 days.
Carbonating Lagers July 18 2014, 0 Comments
Brewing Tip: Want a crisp Octoberfest for the fall? It's not too early to get to brewing it. Crisp lagers benefit from long cold-conditioning, which means brewing it sooner rather than later to get that authentic German lager character.
If you bulk-lager in the fermentor before bottling, you'll want to add some yeast back at bottling time. Try the CBC-1 dry yeast. It's in-part designed for bottle conditioning, so it'll carbonate the beer and drop out fast and fully, allowing your friends to marvel at your crystal-clear Octoberfest!
Also, try brewing up our Gemutlichkeit Octoberfest kit or our brand new Prost! OctoberFAST kit (a faster fermenting, yet clean, malty ale).
Get Hoppy with Hop Stands July 14 2014, 0 Comments
Want to get better hop flavor and aroma in your beer? Try whirlpool hopping, also known as hop stand hopping. After turning off your burner, either slightly cool your wort using your normal method (to 180-190F) and add the hops you'd like to use, or immediately toss them in. Using a sanitized spoon, give your wort a good stir to create a "whirlpool" effect. No need to continuously stir; just get the whirlpool going every once in awhile. You can steep these hops for anywhere from 5 to 60 minutes. If your wort reaches ~170F, it's a good idea to stop the process and to finish cooling your wort down to yeast pitching temperature.
Whirlpool hopping will add a little bit of extra bitterness to your beer, so it's a good idea to account for that when you are making your recipe. However, you'll gain big on hop flavor and aroma! Once you've perfected the technique and brewed the perfect hoppy beer, be sure to enter it into our Hoptoberfest IPA contest that we hold every fall.

Saison Season is Here July 05 2014, 0 Comments
Hey everybody. Saison Season is on us.
Clever puns aside, now is the time to make this Belgian/French style. Notable for its estery flavor and high ABV, saisons are fermented in the 70-90 degree range, depending on yeast strain.
There is a lot of room for creativity here. I fondly remember a customer brewing a hibiscus Saison a while back and bringing in a bottle to receive some feedback. It was unlike anything I had tasted. Aromatic, silky on the palette at the same time robust with a distinct Belgian character.
There is a good amount of overlap sometimes with the Franco/Belg frontiere styles but Saisons are a class by themselves.
Partigyle for More Beer July 02 2014, 0 Comments
Party PARTI-GYLE style on your next big brew day!
"Parti-" = to divide; "gyle" = product of a brew
A parti-gyle brew is when you run off/lauter the first volume of your mash for a strong beer, like a barleywine or imperial stout, and then collect a second volume of runnings from the same grain for a low-gravity beer. You want to calculate a much lower efficiency for the low-gravity wort, somewhere between 35-15%, depending on your system.
So this grain may look spent, but sugars still abound! Run some more water through it, and BOOM! you've doubled your brew day output!